This tutorial will walk you through the steps to set up authentication, authorization and single sign-on in Apache web server using the combination of ModAuthOpenIDC and Azure Active Directory as an identity provider on Rocky Linux release 8.
- Apache is the most widely-used web server in the world. It provides many powerful features including dynamically loadable modules, robust media support, and extensive integration with other popular software.
- OpenID Connect (OIDC) is an identity layer built on top of the OAuth 2.0 framework. It allows third-party applications to verify the identity of the end-user and to obtain basic user profile information. OIDC uses JSON web tokens (JWTs), which you can obtain using flows conforming to the OAuth 2.0 specifications.
- ModAuthOpenidc is a certified authentication and authorization module for the Apache HTTP server that implements the OpenID Connect Relying Party functionality. It relays end user authentication to an identity provider and receives user identity information from that idp. It then passes on that identity information to applications protected by the Apache and establishes an authentication session for the identified user.
- Single sign-on (SSO) is a property of access control of multiple related, yet independent, software systems. With this property, a user logs in with a single ID and password to gain access to a connected system or systems without using different usernames or passwords, or in some configurations seamlessly sign on at each system.
- Azure Active Directory (AzureAD) is Microsoft's enterprise cloud-based identity and access management (IAM) solution. It can sync with on-premise Active Directory and provide authentication to other cloud-based systems, and applications via authentication protocols like OAuth2, SAML, and WS-Security.
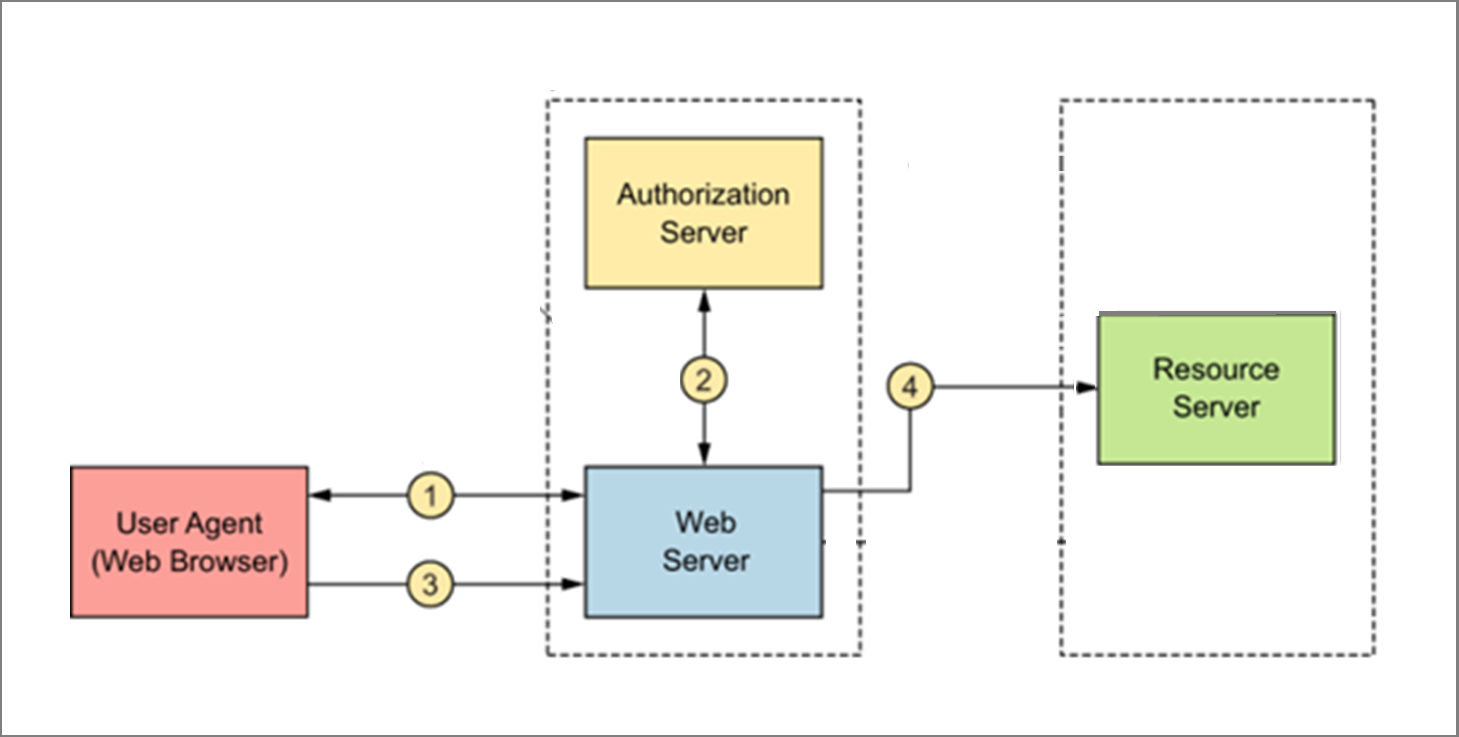
To follow this tutorial along, you will need a (physical or virtual) machine installed with Rocky Linux release 8.
Install Prerequisites
Log in to your Rocky Linux using a non-root user having sudo privileges and perform the following steps.
Type following command on your Rocky Linux to set correct timezone:
Make sure you replace the highlighted text with yours.
Type following command to install Apache, ModAuthOpenidc and other important packages on your Rocky Linux:
At this stage, you have installed all the required packages on your Rocky Linux.
Register an App with Azure Active Directory
To integrate Azure Active Directory authentication in Apache, you need to register your application with Azure and obtain required information so that you can configure your Apache web server using that information.
Log in to your Azure Portal and navigate to Azure Active Directory as show in images below:
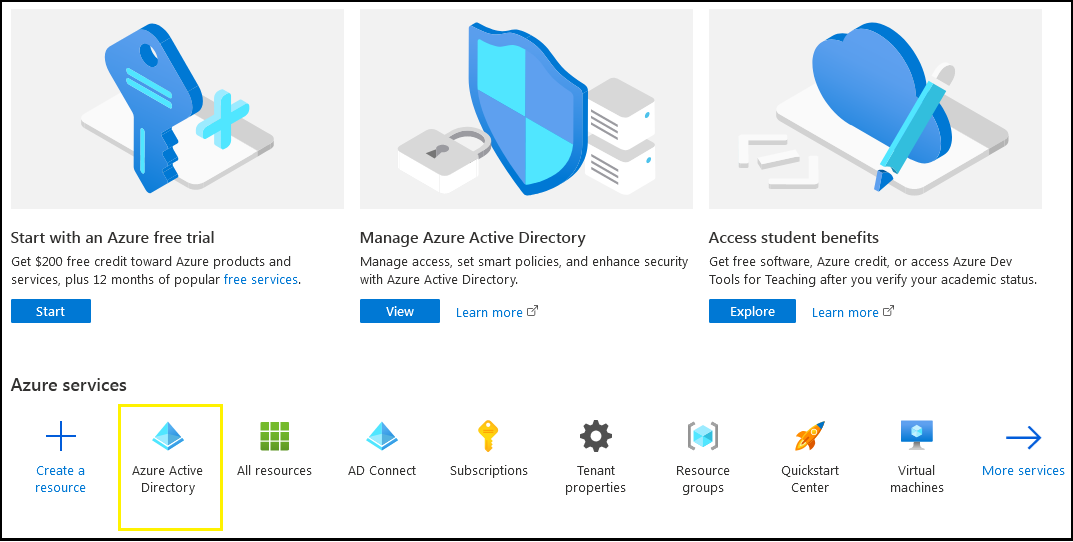
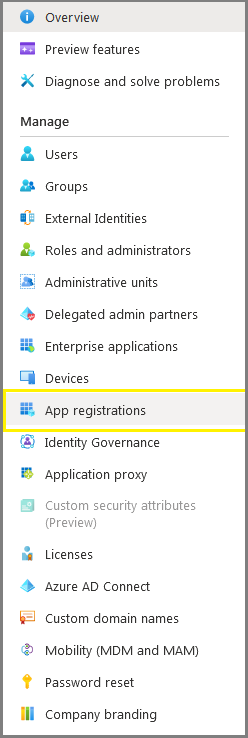
Click on App registrations
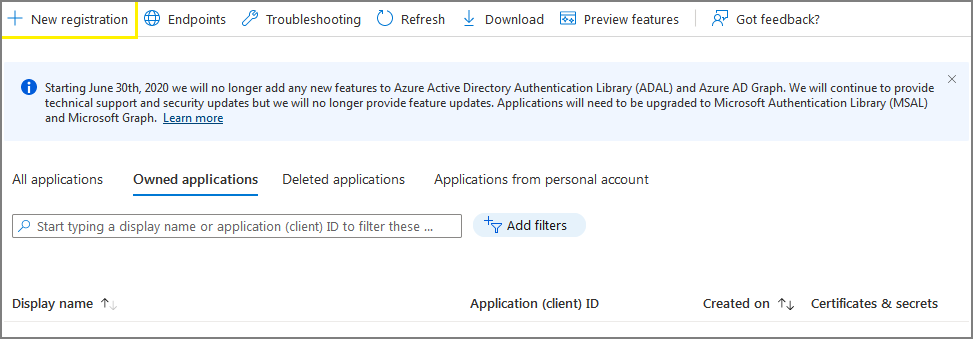
Click on New registration
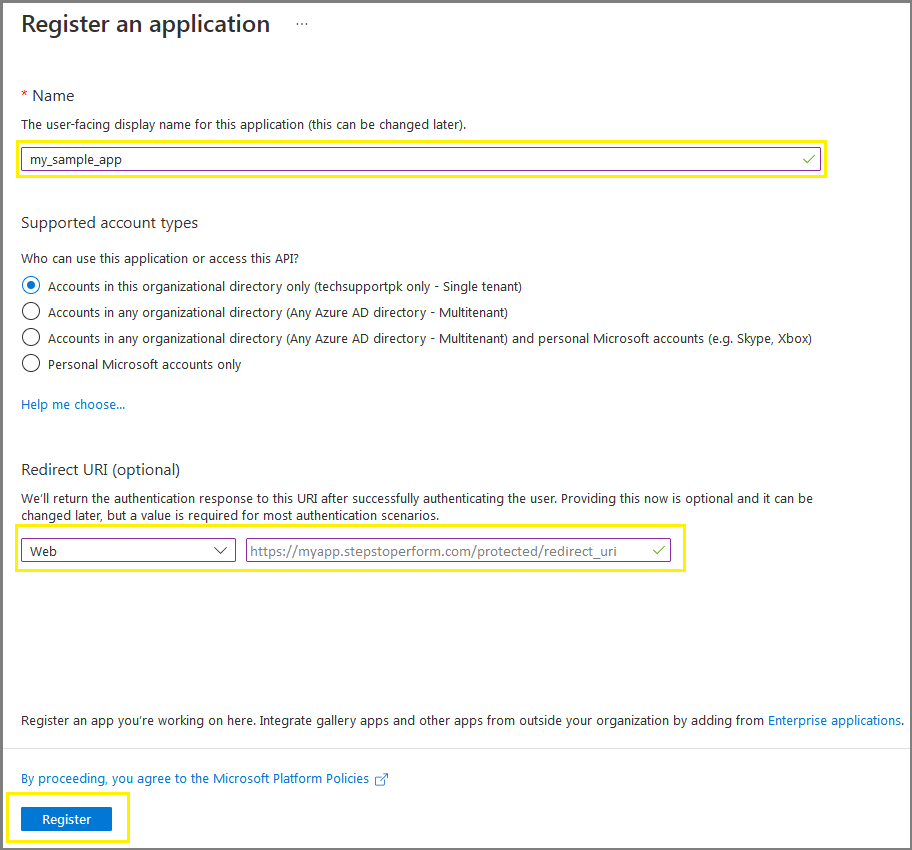
On the following screen:
- Enter the name of your app in the Name box
- Select your account type from Supported account types
- Select Web from Redirect URI drop-down list
- Enter the URI of your application like
- Click on Register
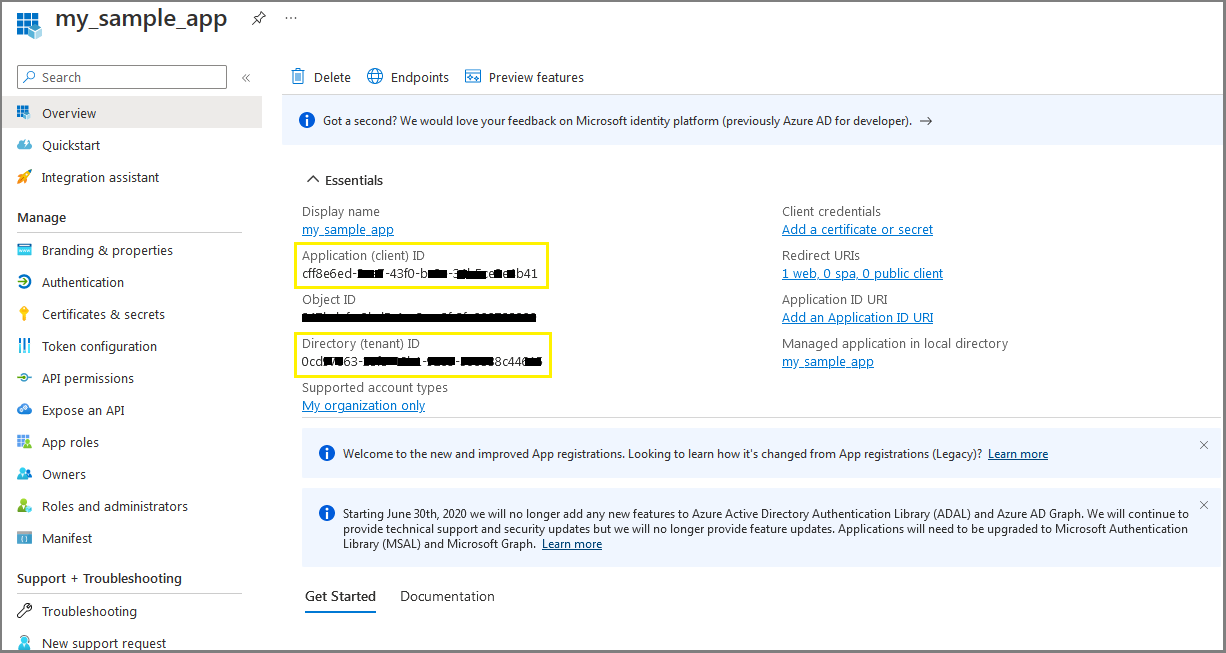
From the following screen, you need to copy:
- Application (client) ID
- Directory (tenant) ID
and paste it on notepad as you need them later to configure your Apache web server.
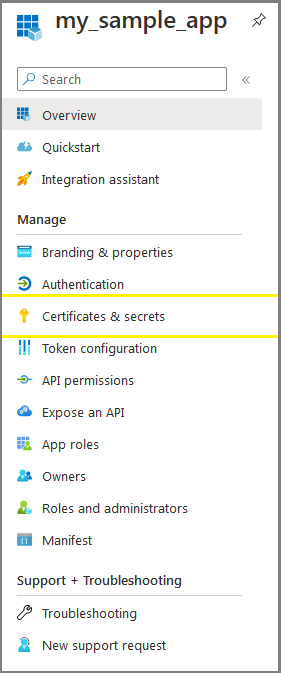
Click on Certificates & secrets
Click on New client secret
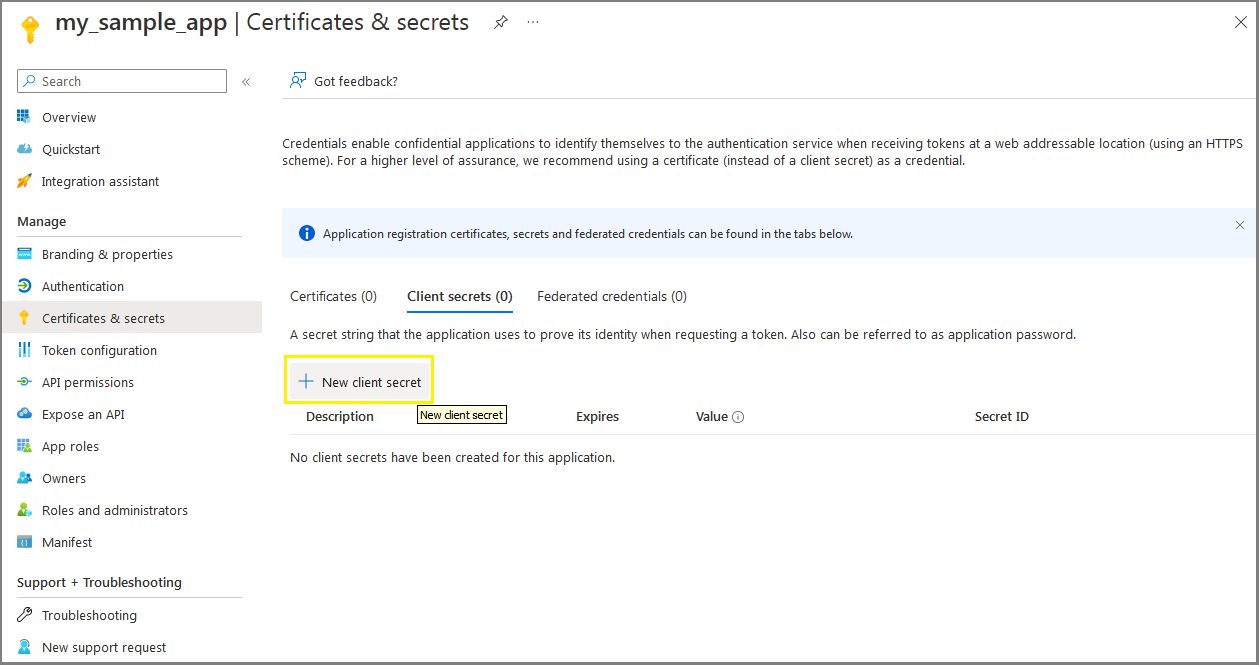
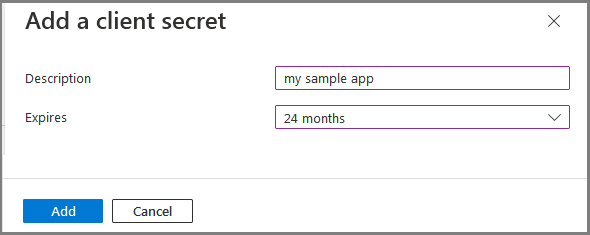
On the following screen:
- Enter description of your app in the Description box
- Select an expiry period from the Expires drop-down list
- Click on Add
On the following screen, you must copy the Value of the client secrets and paste it on notepad as you need it for your Apache configuration later.
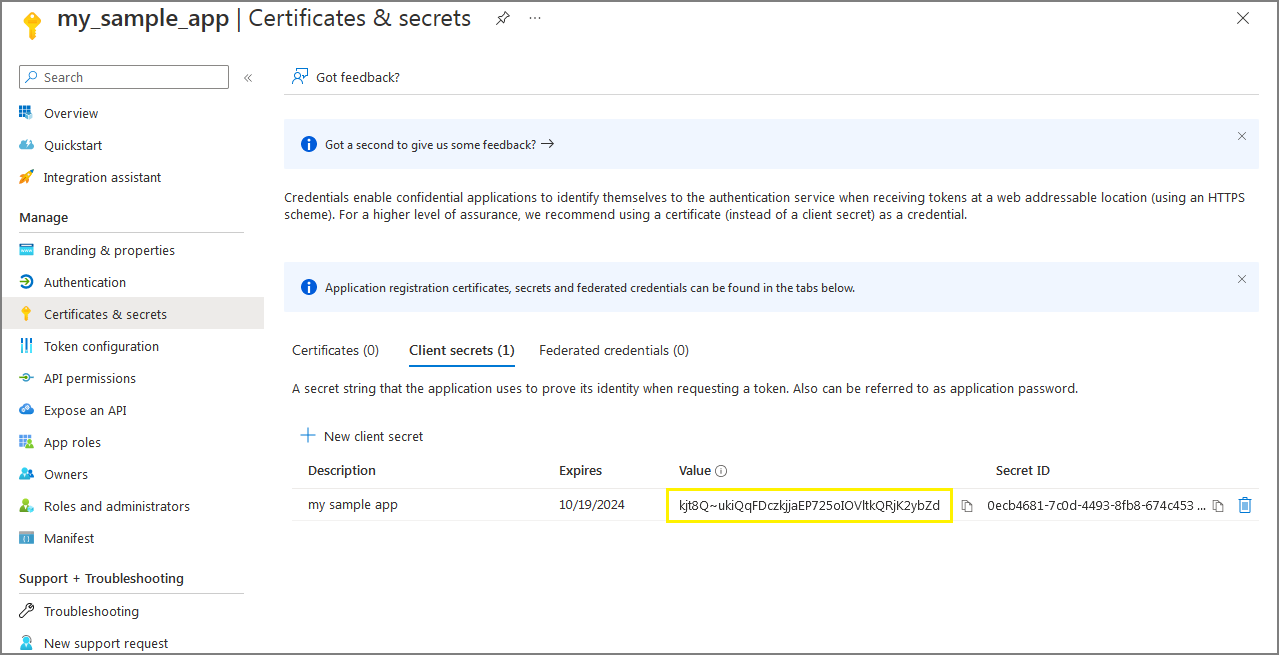
Remember: once you close the above screen, you will not be able to read client secrets value again, as it will be converted to asterisks for security reason,
so make sure you write it down on notepad before closing the above screen.
Navigate to Token configuration then click on Add optional claim
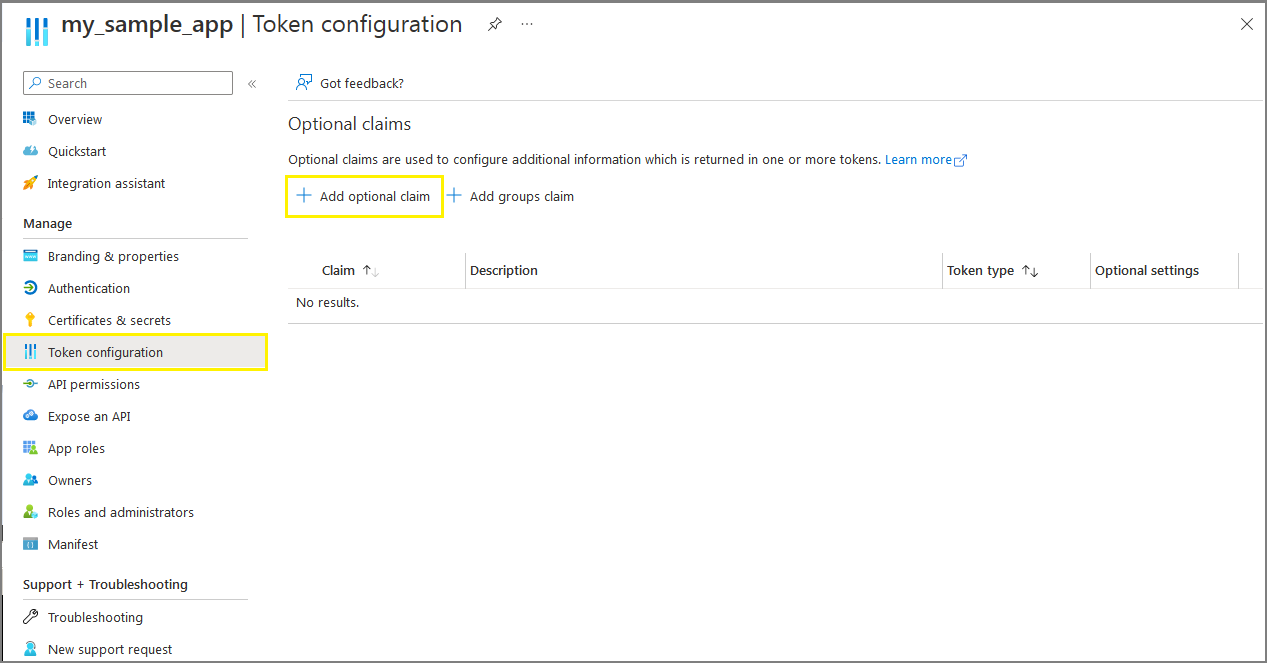
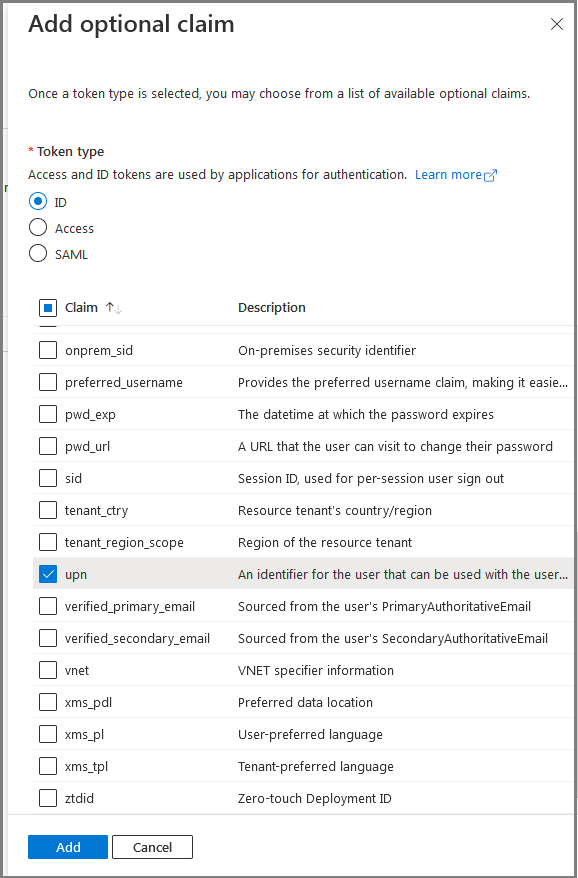
On the following screen:
- Select ID
- From Claim select upn
- Click on Add
On the following screen
- Tick Turn on the Microsoft Graph profile
- Click Add

At this stage, you have successfully completed app registration process on your Azure, and you are now ready to configure your Apache web server to integrate Azure Active Directory authentication for your application.
Configure ModAuthOpenid in Apache
Log in to your Rocky Linux and perform the following steps to configure ModAuthOpenidc, and Apache web server.
Create an openidc.conf file in the Apache root configuration /etc/httpd/conf.d directory:
Add following directives:
Make sure you replace the highlighted text with yours as you have all these information saved on your notepad during azure app registration process:
- OIDCProviderMetadataURL should have your azure tenant ID
- OIDCRedirectURI should be the same URI you configured in Azure app registration step.
- OIDCClientID should have your Application (client) ID.
- OIDCClientSecret should have your app client secret.
- OIDCCryptoPassphrase either you can type a strong password or use the command to generate random password as it is not good idea to keep password in clear text format.
- OIDCRemoteUserClaim should have "upn" or "email" claim type.
Create a self-signed SSL certificate
You can obtain an SSL certificate from any of the digital certificate provider i.e. VeriSign, DigiCert, etc. Since this is our test environment, we will create a self-signed SSL certificate to be used with https://myapp.stepstoperform.com/ url:
Add following directives:
Make sure you replace the highlighted text with yours. Save and close the editor when you are finished.
Execute following command to create a self-signed SSL certificate:
Create Apache VirtualHost
We will create myapp.conf file in Apache root configuration directory /etc/httpd/conf.d to declare https://myapp.stepstoperform.com/protected URL:
Add following directives:
Make sure you replace the highlighted text with yours. Save and close the editor when you are finished.
Create a protected directory in /var/www/html to host your app contents:
We do not have any application to host but for demonstration purpose we will create a sample index page in /var/www/html/protected directory:
Add sample html code:
Save and close the editor when you are finished.
Create info.php sample index page as well
Add sample php code:
Save and close the editor when you are finished.
Create a directory in /var/log/httpd to store your Apache VirtualHost logs:
Type following command to verify Apache configuration:
You will see Syntax OK in the output if everything goes well. If there is any error, fix them first, then proceed to next step.
Restart Apache to take the changes effect:
At this stage your Apache, and ModAuthOpenidc configuration is completed.
Test Apache, ModAuthOpenidc and Azure AD Authentication
Open a web browser and enter your application URL https://myapp.stepstoperform.com/protected for example, in the address bar:

This will take you to your Azure AD login page where you can log in using valid credentiasls:
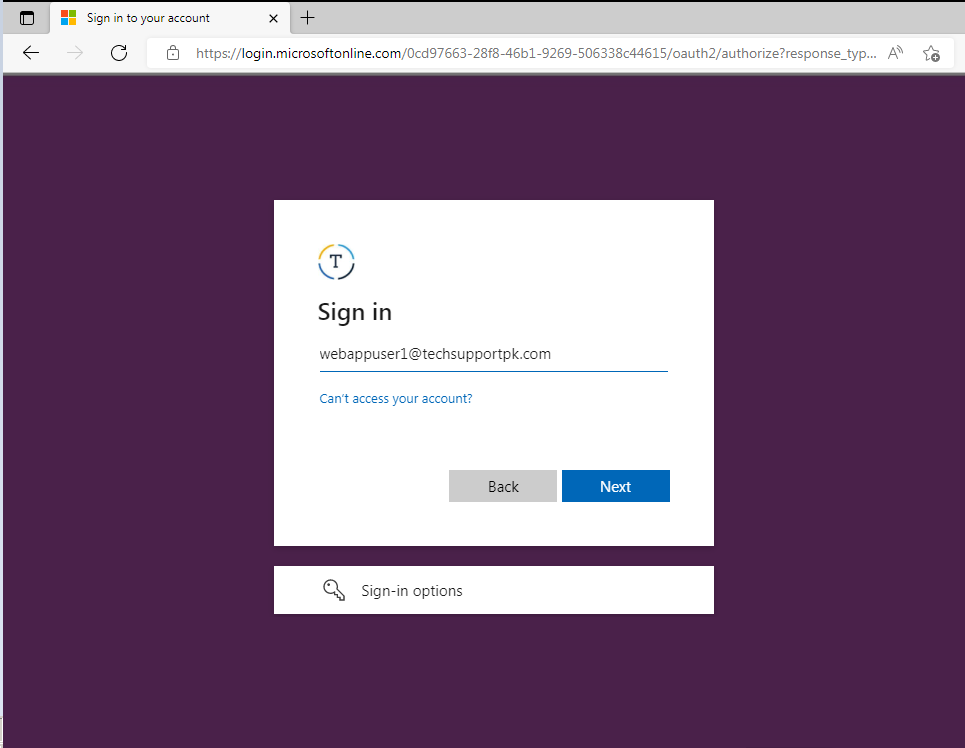
Upon successful authentication, you will be redirected to your sample index page as you can see in screenshot below:

You can see logged in users info by accessing https://myapp.stepstoperform.com/protected/info.php in the browser address bar:

This will show you logged in user's information like as shown in screenshot below:

The info.php is just for testing purpose, you should remove it from your Apache when you are done testing your authentication configuration.
Conclusion
I hope this guide was helpful to configure authentication, authorization and single sign-on in Apache web server using ModAuthOpenIDC and Azure Active Directory to secure your application. We highly appreciate if you leave few words of thoughts about this tutorial in the comment section below.


No comments: